Thursday, October 16, 2014

Diemond Dies DT Sympathy Card

I created this sympathy card using the Diemond Dies Labels 1 Nesting Die Set, the Fern Leaf Die, and the Monarch Butterfly Die Set - Small.  All of the dies can be found at www.diemonddies.com and if you use the coupon code thanksrenee will save 10% off and free shipping on all order $35 or more US and International.   

This is an A2 size card made with 110 lb white card stock.  After I cut and folded the card base I used the Crop-A-Dile Corner Chomper Scallop/Cloud punch (scallop side) to finish the corners.  I added the pale yellow card stock to the front of the card base, slightly small then the card.  I cut another piece of the 110 lb card stock the same size as the card, cut all the corners with the Corner Chomper and then used the largest Labels 1 Nesting Die to cut out the center.  I attached it over the yellow card front with foam squares to give the card dimension.  
I used a Maggie Holmes die to cut the long skinny banner, stamped the sentiment "With Deepest Sympathy" in VersaMark ink, and heat embossed it in a matching yellow Recollections detail embossing powder.  I cut the fern leaves and butterflies out of a "cheaper" 110 lb white card stock and added little strips of foam tape to the backs of the fern leaves and the body of the butterflies and added them onto the card.  To finish the card I added some foam tape to the back of the banner and added it just above the center of the cut out.   
For the inside of the card I cut a piece of the yellow card stock slightly smaller then the card base and cut the corners with the corner chomper.  I used the Labels 1 Nesting Die Set again in a smaller size to cut a piece of white card stock and added the sentiment "So Very Sorry For Your Loss" in the same yellow embossing powder.  
I'm so happy with how this card turned out!  Unfortunately it didn't photograph as well as I had hoped it would.  Make sure you check out all the dies at www.diemonddies.com and take advantage of my coupon code!   


Monday, September 29, 2014

Diemond Dies Hanging Picture Frame


I created this beautiful set of frames using dies from Diemond Dies.  Its so easy to create beautiful flowers from plain white card stock, ink, and a few quick passes through your die cutting machine!


For this project I started with the Artminds Wood Frame from Michaels (item #10135481) available here: http://www.michaels.com/artminds-wood-frame-3-piece/10135481.html or in store for $4.99.  I removed the centers of the frames and used Valspar Interior Satin Paint in the color Encounter from Lowes which is a beautiful blue color.  ( http://www.lowes.com/pd_539017-4-007.0539017.003_0__?Ntt=539017 ) I love buying these paint samples, they usually run $2.98 for 8oz of high quality paint.  


For the top frame I created the pink, peach, and blue flowers using the Diemond Dies Sugar Plum Flowers Die Set available here: http://diemonddies.com/wordpress/?product=diemond-dies-sugar-plum-flowers-die-set  The small green flower was created using the Diemond Dies Fancy Flowers Die Set available here: http://diemonddies.com/wordpress/?product=diemond-dies-fancy-flowers-die-set  I also used the Diemond Dies Natures Flourish Die: http://diemonddies.com/wordpress/?product=diemond-dies-natures-flourish-die and the Diemond Dies Fern Leaf Die: http://diemonddies.com/wordpress/?product=coming-soon-4  I used various Tim Holtz Distress Inks and finger daubers to color all the die cuts before constructing the flowers.  


For the middle frame I again used the Diemond Dies Sugar Plum Flowers Die Set to create the purple and yellow flowers.  I love how you can use the same die and make several different types of flowers!  The large pink rose was created using the Diemond Dies Realistic Roses Die Set:  http://diemonddies.com/wordpress/?product=realistic-roses-die-set  I again used the Natures Flourish and the Fern Leaf Dies underneath the flowers.   


For the third and final frame I again used the Diemond Dies Sugar Plum Flowers Die Set to create the pink and peach flowers.  The peach flower makes the third flower made using the Sugar Plum Flowers Die!  The yellow flower was made with the Diemond Dies Sunflower Die set: http://diemonddies.com/wordpress/?product=coming-soon with a flower made from the Fancy Flowers Die Set for the brown center.  


I finished the frame by adding some pattern paper from the Recollections The Sweetest Things 12x12 paper pad ( http://www.michaels.com/recollections-the-sweetest-thing-cardstock-paper-pad/10263664.html ) and tying some tan seam binding between each frame and as the hanger.  I used some Fray Block by Tailor on the ends of the seam binding but it changed the color of the ends slightly so I'm not sure I will be doing that again.  

All of the dies that I used for this project plus all the other great dies from Diemond Dies are available at http://diemonddies.com/wordpress/ and you can use my coupon code thanksrenee to save 10% off and free shipping on all orders $35 or more US and International!  


Sunday, September 28, 2014

My First Cork Wreath!

When my aunt sent me a text asking if I wanted the two buckets of corks she had I was like "HECK YEAH!" I had no idea what I would do with them but I knew it would take me a lifetime to save that many corks on my own!  My aunt was volunteering at her local recycling center and had asked them to save them for her because she wanted to make a wreath but later decided she couldn't do it.  So...a couple days ago I started thinking about the wreath and decided I would make it for her for Christmas.  Here's how it went...
I started by doing some research, on Pinterest of course, surprisingly there's not as many cork projects out there as you would think but I knew I'd find wreaths, and I did!
My main reason for looking was to figure out how to attach the corks to the wreath...I had purchased a 12" foam wreath from Joanns.  The wreath that I purchased was more like regular styrofoam with square edges and not the thin round extruded foam type wreath.  I picked this type because I thought it would be more forgiving when I was attaching the corks and the extruded foam type of wreaths have always seemed more brittle to me.
In the end toothpicks seemed to be the direction I was leaning for attaching the corks to the wreath.  How hard could it be right?  Corks aren't very hard, I'd just stick the toothpick into the center and stick them into the foam....or so I thought.


Turns out corks are harder then you would think and toothpicks aren't 2x4s meaning they break easily...very easily.  My best solution was to use needle nose pliers and to push the toothpicks in a tiny bit at a time.  It wasn't a perfect plan and there were many broken toothpicks but I thought I was good.


I knew I wanted some type of adhesive to keep the corks in place after they were inserted into the foam and decided on Glossy Accents because I had a bottle that was starting to yellow and I wanted to finish it up.  I dipped the ends of the toothpicks into the Glossy Accents before inserting them into the foam in the hopes of the Glossy Accents filling in all the nooks and crannies of the foam and holding the toothpicks in place.  If I had it all to do again I'm pretty sure I would just go with hot glue.


I started sticking the corks into the foam at different angles trying to make sure the white foam wasn't visible between each cork and the toothpicks started snapping....and so my husband was off to the store for more.  He returned we 1600 toothpicks and I started replacing the ones that broke with the new, even more delicate toothpicks...

Turns out two toothpicks are better then one!  But don't kid yourself, they still broke.  


When I couldn't position the corks well enough to cover all the foam I would cut a cork in half and stick it in between the corks for better coverage.  If I ever got my hands on this many corks again I may consider cutting all the corks in half so they would go further since toward the end I was really worried I wasn't going to have enough corks to finish.  


In the buckets my aunt had given me there was a mix of actual cork corks and what I was calling synthetic corks, I'm sure there is a proper name for them but I have no idea what that would be.  Some of the "synthetic" corks had these seals on them which I ripped off and tossed in a pile figuring I could use them for something down the road.  

Then it dawned on me...I was partial to the cork corks of course because they looked like cork but I knew there was no way I had enough to do the whole wreath in the cork ones so I tried to use the other ones sparingly throughout the wreath and more along the edges.  The closer I got to filling the wreath the more I realized I was running really low on the cork corks.  If I added more of the "synthetic" corks into the wreath I could then add the seals back onto some of them and sort of camouflage the fact that they weren't cork.  I think they look awesome scattered throughout the wreath!

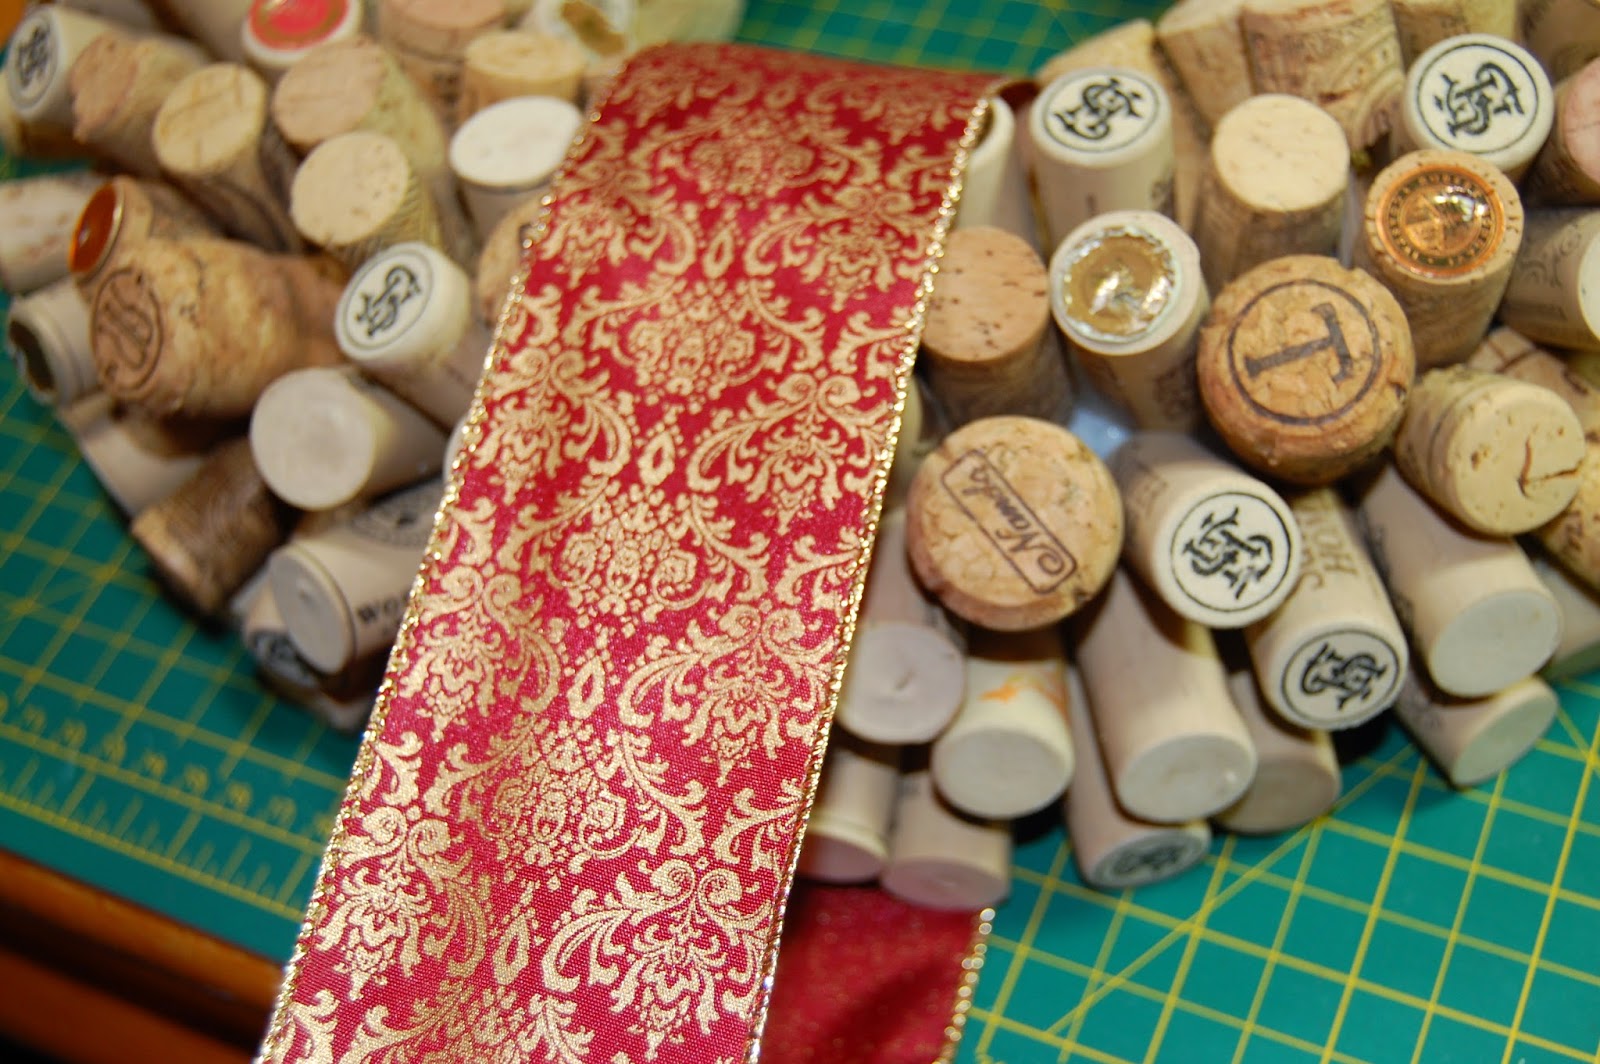
No matter what I did though, there was no getting around the fact that I was running out of the real corks...I knew I was going to be adding a ribbon to hang the wreath by and that the ribbon I had purchased was 2 1/2" wide so I grouped all the "synthetic" corks at the top where they would be covered by the ribbon and used the cork ones where they could be seen.   
I chose a burgundy and gold wired ribbon which I found at Pat Catans for 2 for $5 in the Christmas ribbon bin.  I wanted the ribbon to have the burgundy and gold colors because I think those colors together have a Tuscan feel and would be great on a wine cork wreath.  
Bow time!  For the hanger I just simply took a length of ribbon and wrapped it around the top of the wreath and tied a slip knot.  I created the double loop bow that I had learned from my days of gift wrapping at JCPenney.  Sorry I don't have pictures of the bow making process because it requires two hands to complete, maybe one day I do a post on how to do it.  
I attached the bow by sliding a long piece of wire behind the bows center and pushing both ends of the wire through the foam on either side of the hanger, I twisting them together on the back to keep the bow in place.  
Here is the finished wreath!  I am in love with how it turned out!  I love the mix of cork colored ends with the wine stained ones and the ends with the tattered seals.  I can't wait to see how much my aunt likes it, I just wish I didn't have to wait till Christmas...and find a way to store it till then!  I'm so sad it used up all but a couple hand fulls of corks and I don't have enough to make myself a wreath!  Oh well, turns out there's page after page of people selling large lots of used corks on eBay...maybe I'll break down and buy some for my own wreath, it might look nice hanging on the wall of my "fat chef" themed kitchen...I wonder if they have "fat chef"ribbon on eBay too!?!  Hmmmm...stay tuned!


Friday, October 4, 2013

Diemond Dies DT Project Using the Sunflower and Fern Leaf Dies


I created this card using the tiny flower center die from the Sunflower set.  I love how there are several different ways to use this die set and several different flowers you can make!

To start the card I chose to use a thick white card stock for the base.  I cut it down to 5 1/2" x 4 1/4" and rounded the outer corners with my 1/2" Corner Chomper.  I used Tim Holtz Distress Inks in the colors Dusty Concord and Milled Lavender to distress around the edges of the entire card.  I chose a neutral paper for the background from the Recollections Habitat 12"x12" paper pad. 


I used the Fern Leaf die to cut leaves from two different shades of shimmery green paper.  I glued three fern leaves under where the flowers would be and used the centers of three fern leaves as the base stem for my flowers.  I added a forth fern leaf after the flowers were complete to break up the first and second flowers.  


Creating the flowers was definitely the most time consuming part of this card!  Before cutting any flowers I colored my paper so I would have a variety of different shades of purple in my flowers.  I achieved my desired colors by smearing the Time Holtz Distress inks again in Dusty Concord and Milled Lavender onto my craft sheet, spraying it with water, laying my white card stock onto the ink and moving it around to cover the entire paper.  I used my heat tool to speed up the drying process but its not necessary.   


After my paper was dry I cut it into 1" strips and then used the Sunflower centers die to cut out my flowers on my Big Kick machine.  I have no idea how many times I had to run it through to get enough flowers, cutting the strips definitely speeds up the process.  


After everything was cut I used the McGill's foam mat and a ball tool to soften each flower and form them into a "cup" shape.  


I squirted some Scotch Quick Dry liquid glue onto my craft sheet and used craft tweezers to pick up each flower and dipped them into the glue and started building my flowers.  


Once my flowers were finished and I added the last fern leaf in front of them I tied a small bow with some OHHH So Trendy Jute Ribbon in Ivory and hot glued it on top of the stems.  


I'm so happy with the finished product!  It was definitely worth all the work!

Check out Diemond Dies at www.diemondies.com to purchase the Sunflower and Fern Leaf dies or any of the other amazing dies and use discount code reneesfriend to receive 10% off and free shipping. 


Thursday, October 3, 2013

Happy Fall Y'all Project 2


Here is my second card using the stamp set Happy Fall Y'all form My Style Stamps!  I LOVE this stamp set, I'm having so much fun coloring her and creating these cards.


I Copic colored the main image with the following colors: skin E00, E11, and R20 Hair E50, E51, E53, and E55 hat and boots E55, E57, and E59 overalls BG72, BG75, and BG78 Shirt RV66, YG03, YG17, YG25 and the hay bale in Y32, Y35, Y38, YR04, and YR07.  


I also changed how I colored the hay bale on this card by adding some horizontal lines in all the colors so it looked more like straw.  


I stamped the chick and chicken onto the watercolor paper and covered them with a mask to protect them from the ink when I did the background.  I colored the chick using a water pen and a Recollections marker in Mandarin and an American Crafts Stamp Marker in Sunflower.  The chicken was stamped on white card stock and I used the Mandarin color for her beak and another American Crafts Stamp Marker in Brown Sugar just so she wasn't perfectly white all over.  I then used some foam squares to give her some dimension.  


I created the background on watercolor paper by smearing around Tim Holtz Distress Inks in Old Paper, Tea Dye, Shabby Shutters, and Mowed Lawn.  I sprayed the ink with water and laid the watercolor paper in the ink and then used my heat tool to set it.  


I cut a banner out of craft card stock using the Spellbinders Nested Pennants die set and stamped the sentiment Howdy Chickie! and did a dashed line around the banner.  I added a cute little bow to the top corner out of some twine.  


Happy Fall Y'all

I created this card using both the Little Pumpkin and Happy Fall Y'all Stamp sets.  I love this girl!  She was so much fun to color and she is a great size for a card.  


I did a lot of coloring on this card, I used Copic markers in the following colors:  E00, E11, R20, E50, E51, E53, E55, E57, E59, BG72, BG75, BG78, G17, YG17, YR04, YR07, Y32, Y35, Y38, R22, R24, R29, RV63, RV66, and RV69


Her skin is colored in E00, E11, and R20 hair in E50, E51, E53, and E55 her overalls in BG72, BG75, and BG78 her hat and boots in E55, E57, and E59 and her shirt was colored with YG17, RV63, RV66, and RV69.  The hay bale was colored with Y32, Y35, Y38, and G17.  


I used the pumpkin from Little Pumpkin and just cut the girl off so I could sit baskets on it.  The pumpkin was stamped on orange card stock and colored with Y38, YR04, and YR07.  The baskets were colored with E55, E57, and E59.  Before I cut the baskets out I used a craft knife to cut a slit at the top of the basket which I slid the apples, leaves, and eggs into.  


I stamped out the cat on the pumpkin from the Little Pumpkin stamp set and colored it with Y38, YR04, YR07, E55, E57, and E59.  I also stamped out the leaves that are under the sign in the Happy Fall Y'all stamp set, colored it and added it behind the pumpkin.  


I cut banners using a banner die from the Spellbinders Nested Pennants die set, stamped the sentiment Happy Fall Y'all and added dashed lines to all the banners.  


I layered pattern paper, card stock, and burlap paper on a craft card base and used foam tape to add her on top.  I love her, and I love how the two stamp sets can be used together.